What is the difference between a 'Detail Callout' and a 'Floor Plan Callout'?
When you start creating a Callout View, you have some options; Detail View and Floor Plan.
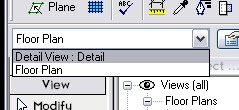
If you create a floor plan callout of a plan view, the callout view displays in the Project Browser under plan views. Alternatively, if you make a detail view of a floor plan, the callout displays as a detail view in the Project Browser.
Other differences include:
.Room Tags cannot be visible in detail callouts.
.Detail callouts can be shown in all floor plans that the callout intersects, whereas floor plan callouts can only be visible in the view they were created in.
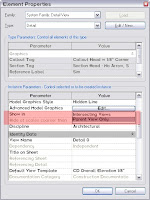
.Detail callouts cannot have a color scheme assigned to it.
Remember, once you choose the type of callout, that's it. There is no toggling between the 2 so choose wisely. Use common sense, if you are creating a construction detail, use a detail callout, if you need just a enlarged floor plan...you got it! You have been warned.
10.20.2008
10.19.2008
Object Visibility
Why can't I see the object I just placed?
The object you just placed isn't visible because either, your active workset
or the category that object belongs to, is turned off. Check your 'Visibility/Override Graphics' (VV) to make sure:
the category (under the the Model Categories tab)
the current active workset (under the Worksets tab) are checked.
The object you just placed isn't visible because either, your active workset
or the category that object belongs to, is turned off. Check your 'Visibility/Override Graphics' (VV) to make sure:
the category (under the the Model Categories tab)
...and...
the current active workset (under the Worksets tab) are checked.
9.18.2008
Fill Patterns
How do I get that AutoCAD pattern into Revit?
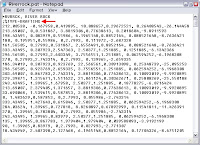
Both AutoCAD and Revit derive their patterns from *.PAT files. You will need to know that name of the pattern you want to use (i.e. find it in AutoCAD) then browse out to open ACAD.pat in notepad. Do a document search (Ctrl+F) to find the name of the pattern and copy all of the lines associated with that pattern (it's all jibberish).
Start a brand new notepad file and paste that info in. Before you continue, make sure you add the line ;%TYPE=MODEL (or DRAFTING) right under the *pattern-name. Save the file as a *.pat file.
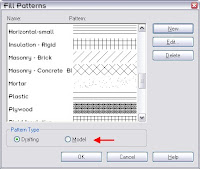
Now in Revit, go to Settings>Fill Patterns and choose either a Drafting or Model fill pattern and go to NEW.
Choose Custom then Import. Browse out to our *.pat file and click 'Open'. Set the scale of the pattern that hit 'OK'.
MORE TO COME...
Subscribe to:
Posts (Atom)